Migrate from an existing Run As account to Managed identities
Graphical runbooks
Check if a Run As account is used in graphical runbooks
- Check each of the activities within the runbook to see if it uses the Run As account when it calls any logon cmdlets or aliases, such as
Add-AzRmAccount/Connect-AzRmAccount/Add-AzAccount/Connect-AzAccount. - Examine the parameters that the cmdlet uses.
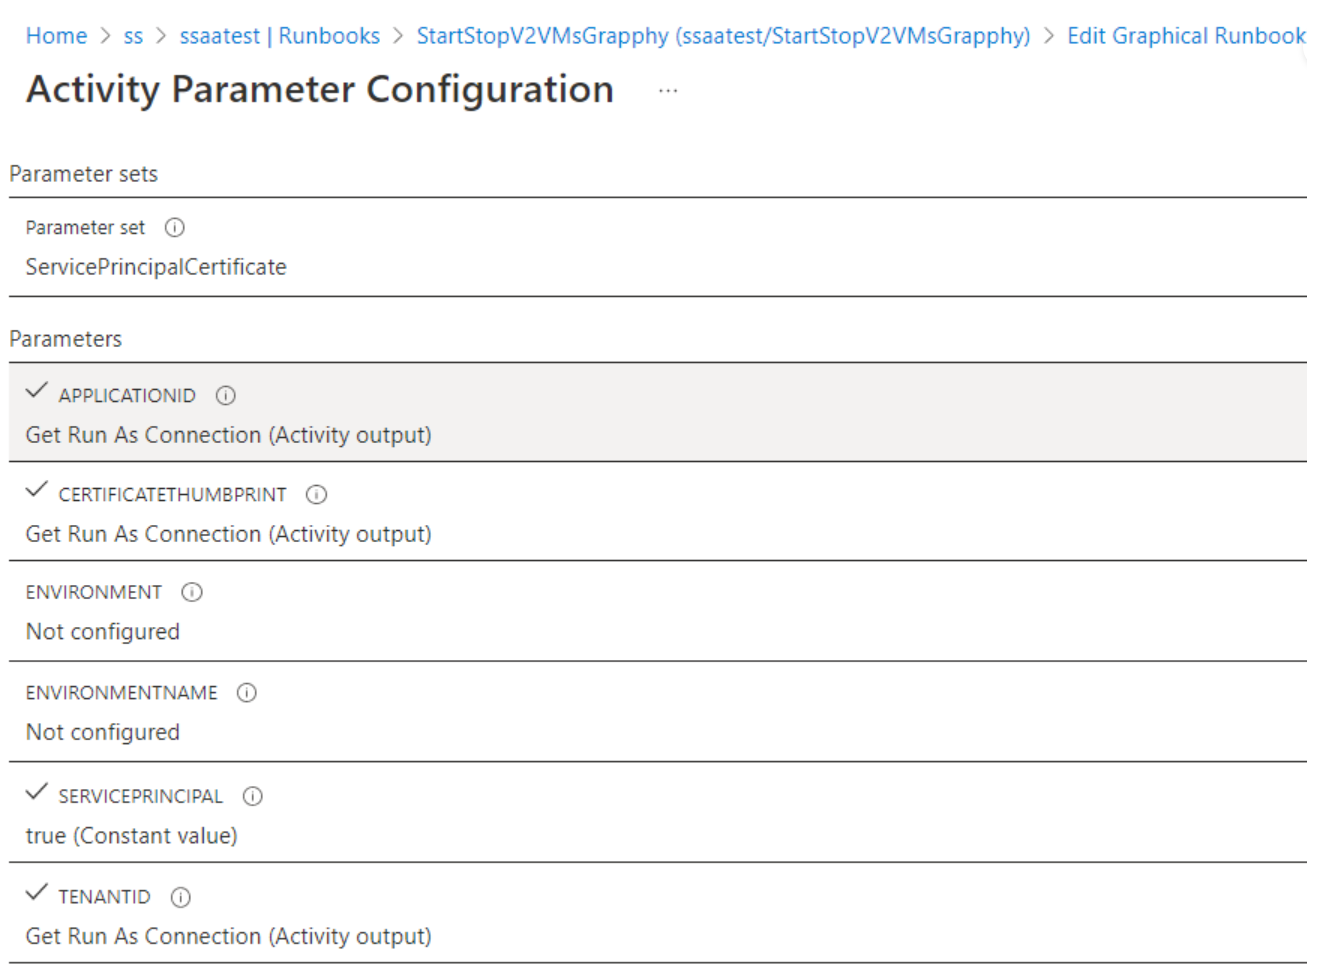 For use with the Run As account, the cmdlet uses the
 ServicePrinicipalCertificateparameter set toApplicationId.CertificateThumbprintwill be fromRunAsAccountConnection.
Edit a graphical runbook to use a managed identity
Edit a graphical runbook to use a managed identity is not work in graphical runbook. So we have create a new graphical runbook as like same like for stop / start VM via managed identity
Note 1st need to import AZ Module
IMPORTING THE AZ MODULE
If your runbook already was using the Az module and not the AzureRM module, skip ahead to the next section.
If we go back to our Automation account and go down to Modules, we can see that we do not have the Az module available for our runbooks.
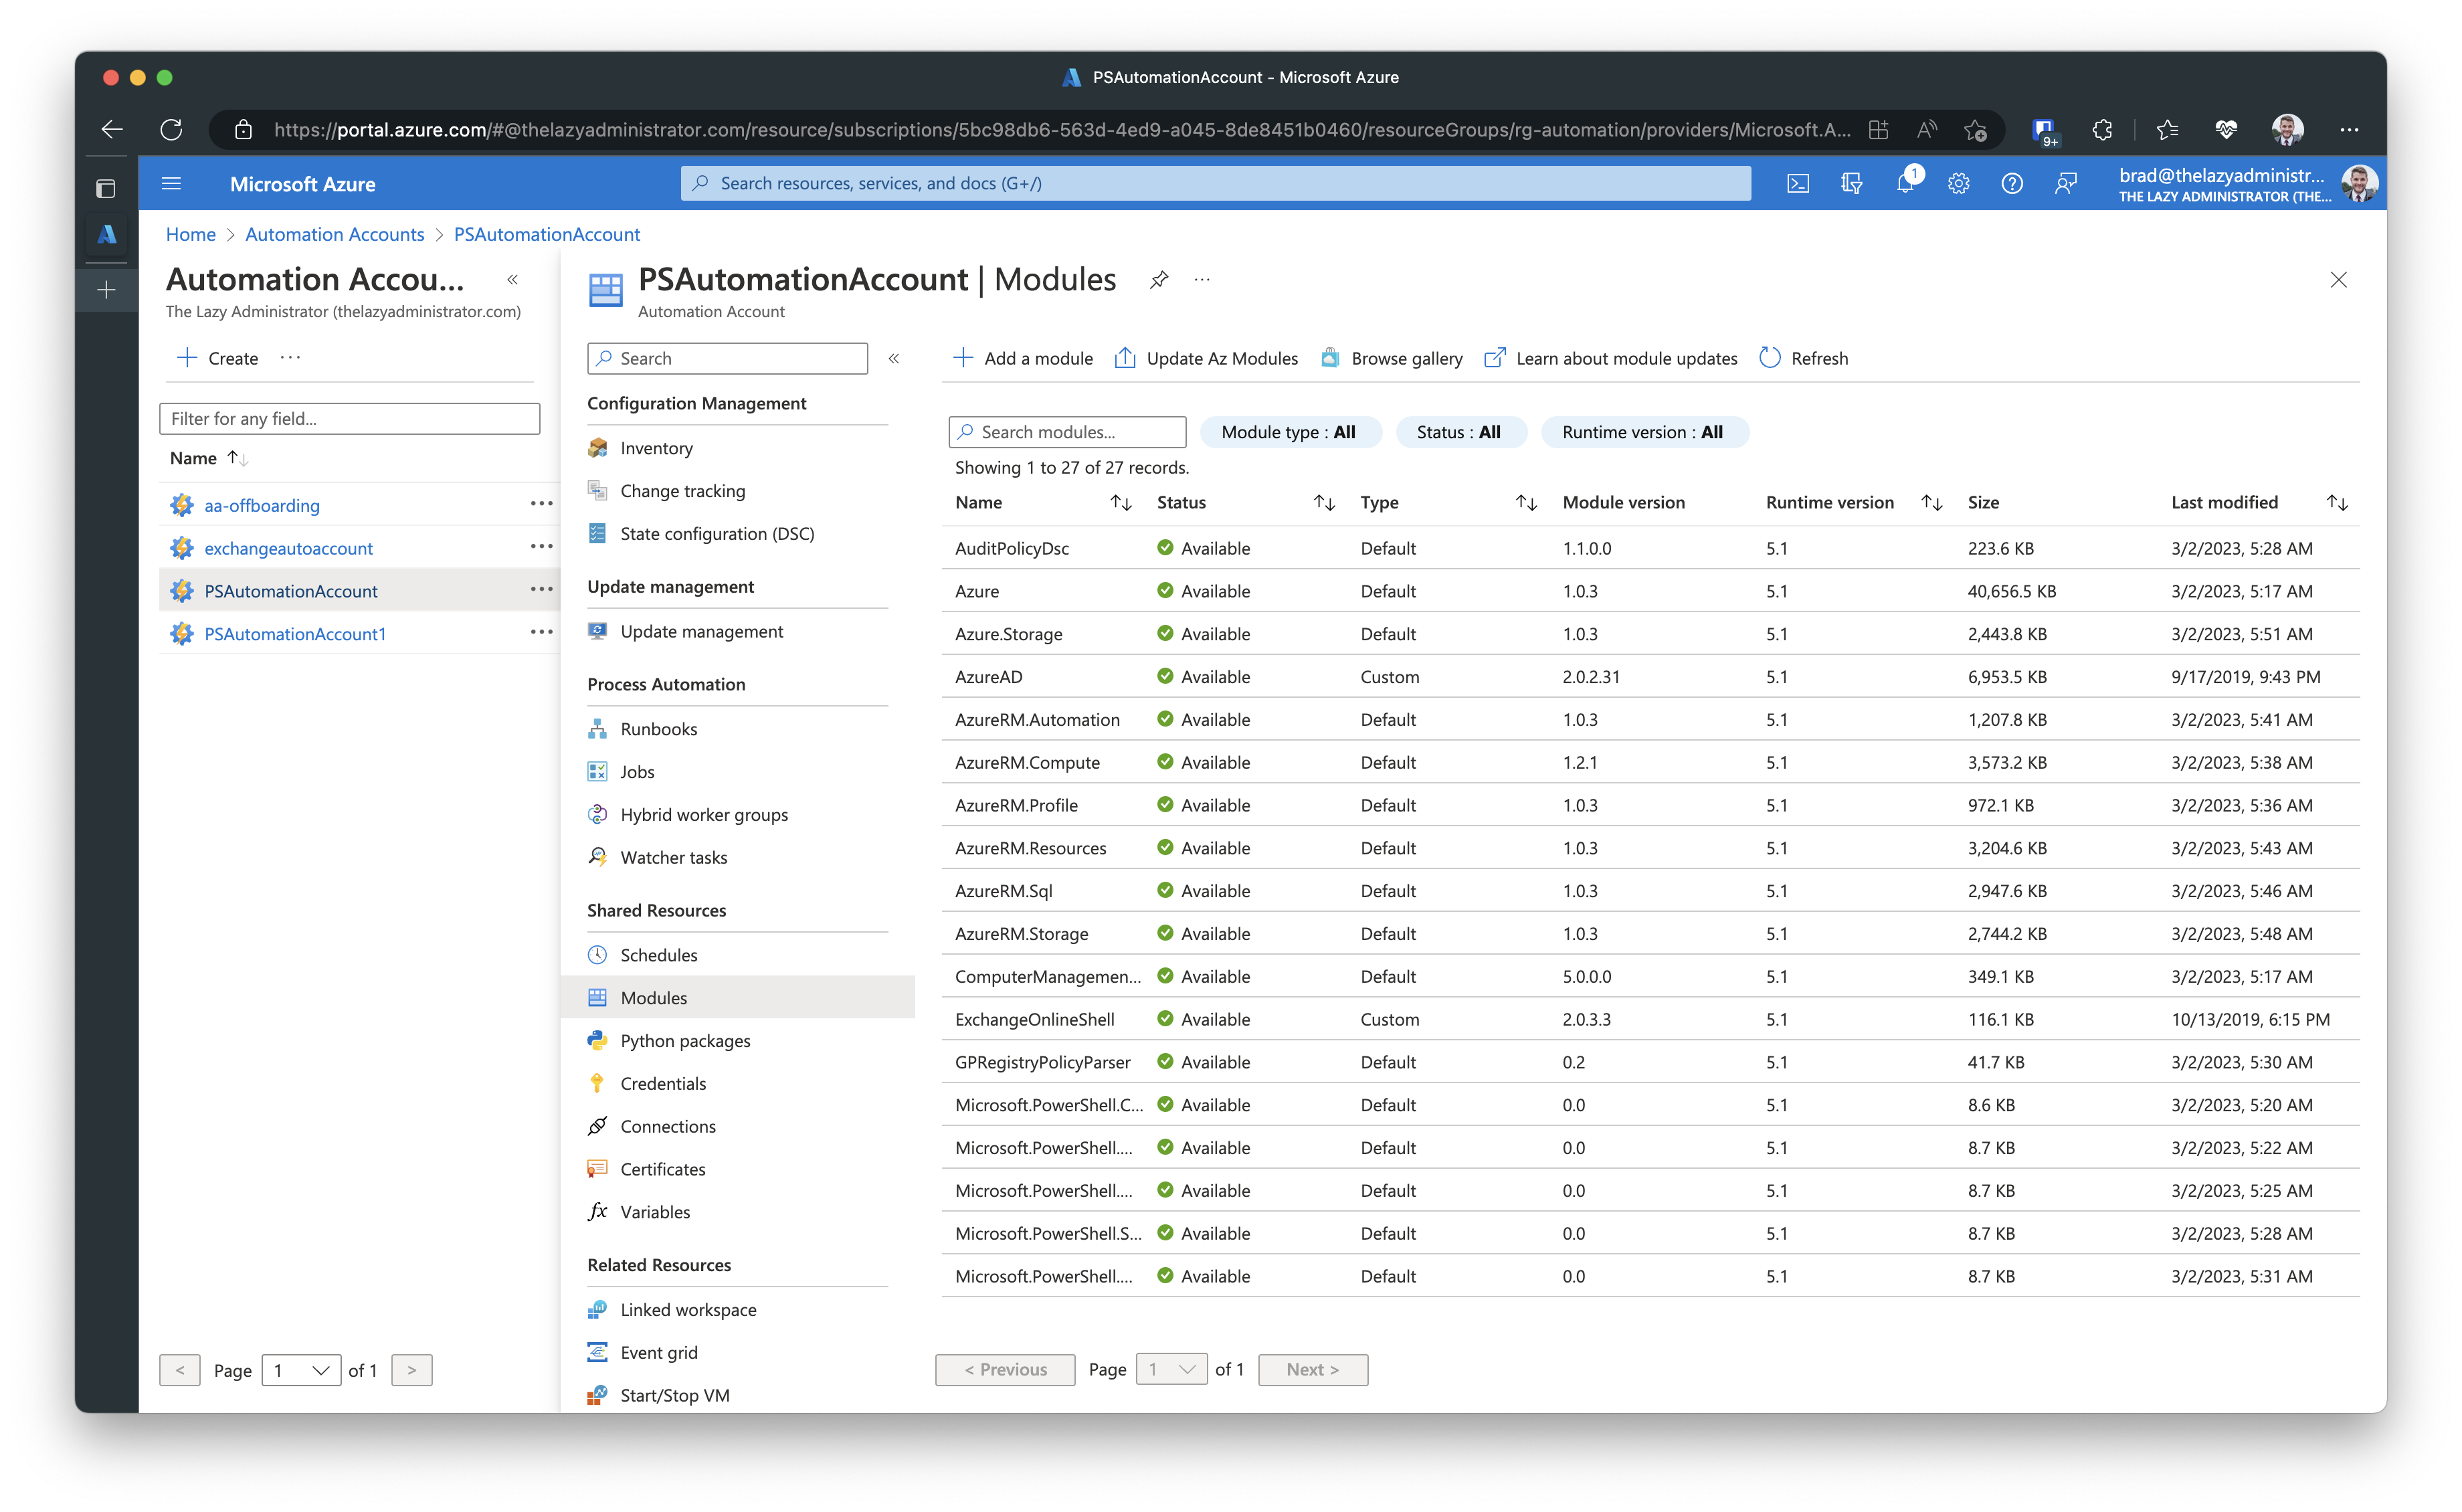
Click + Add a module and we are going to browse from the gallery. Looking at my runbook I am calling several Az commands. Connect-AzAccount, Get-AzResource, and Get-AzResourceGroup. I can see that Get-AzResourceGroup comes from the module Az.Resources, as well as Get-AzResource. Connect-AzAccount comes from Az.Accounts. I will import Az.Accounts first because Az.Resources is dependent on Az.Accounts.
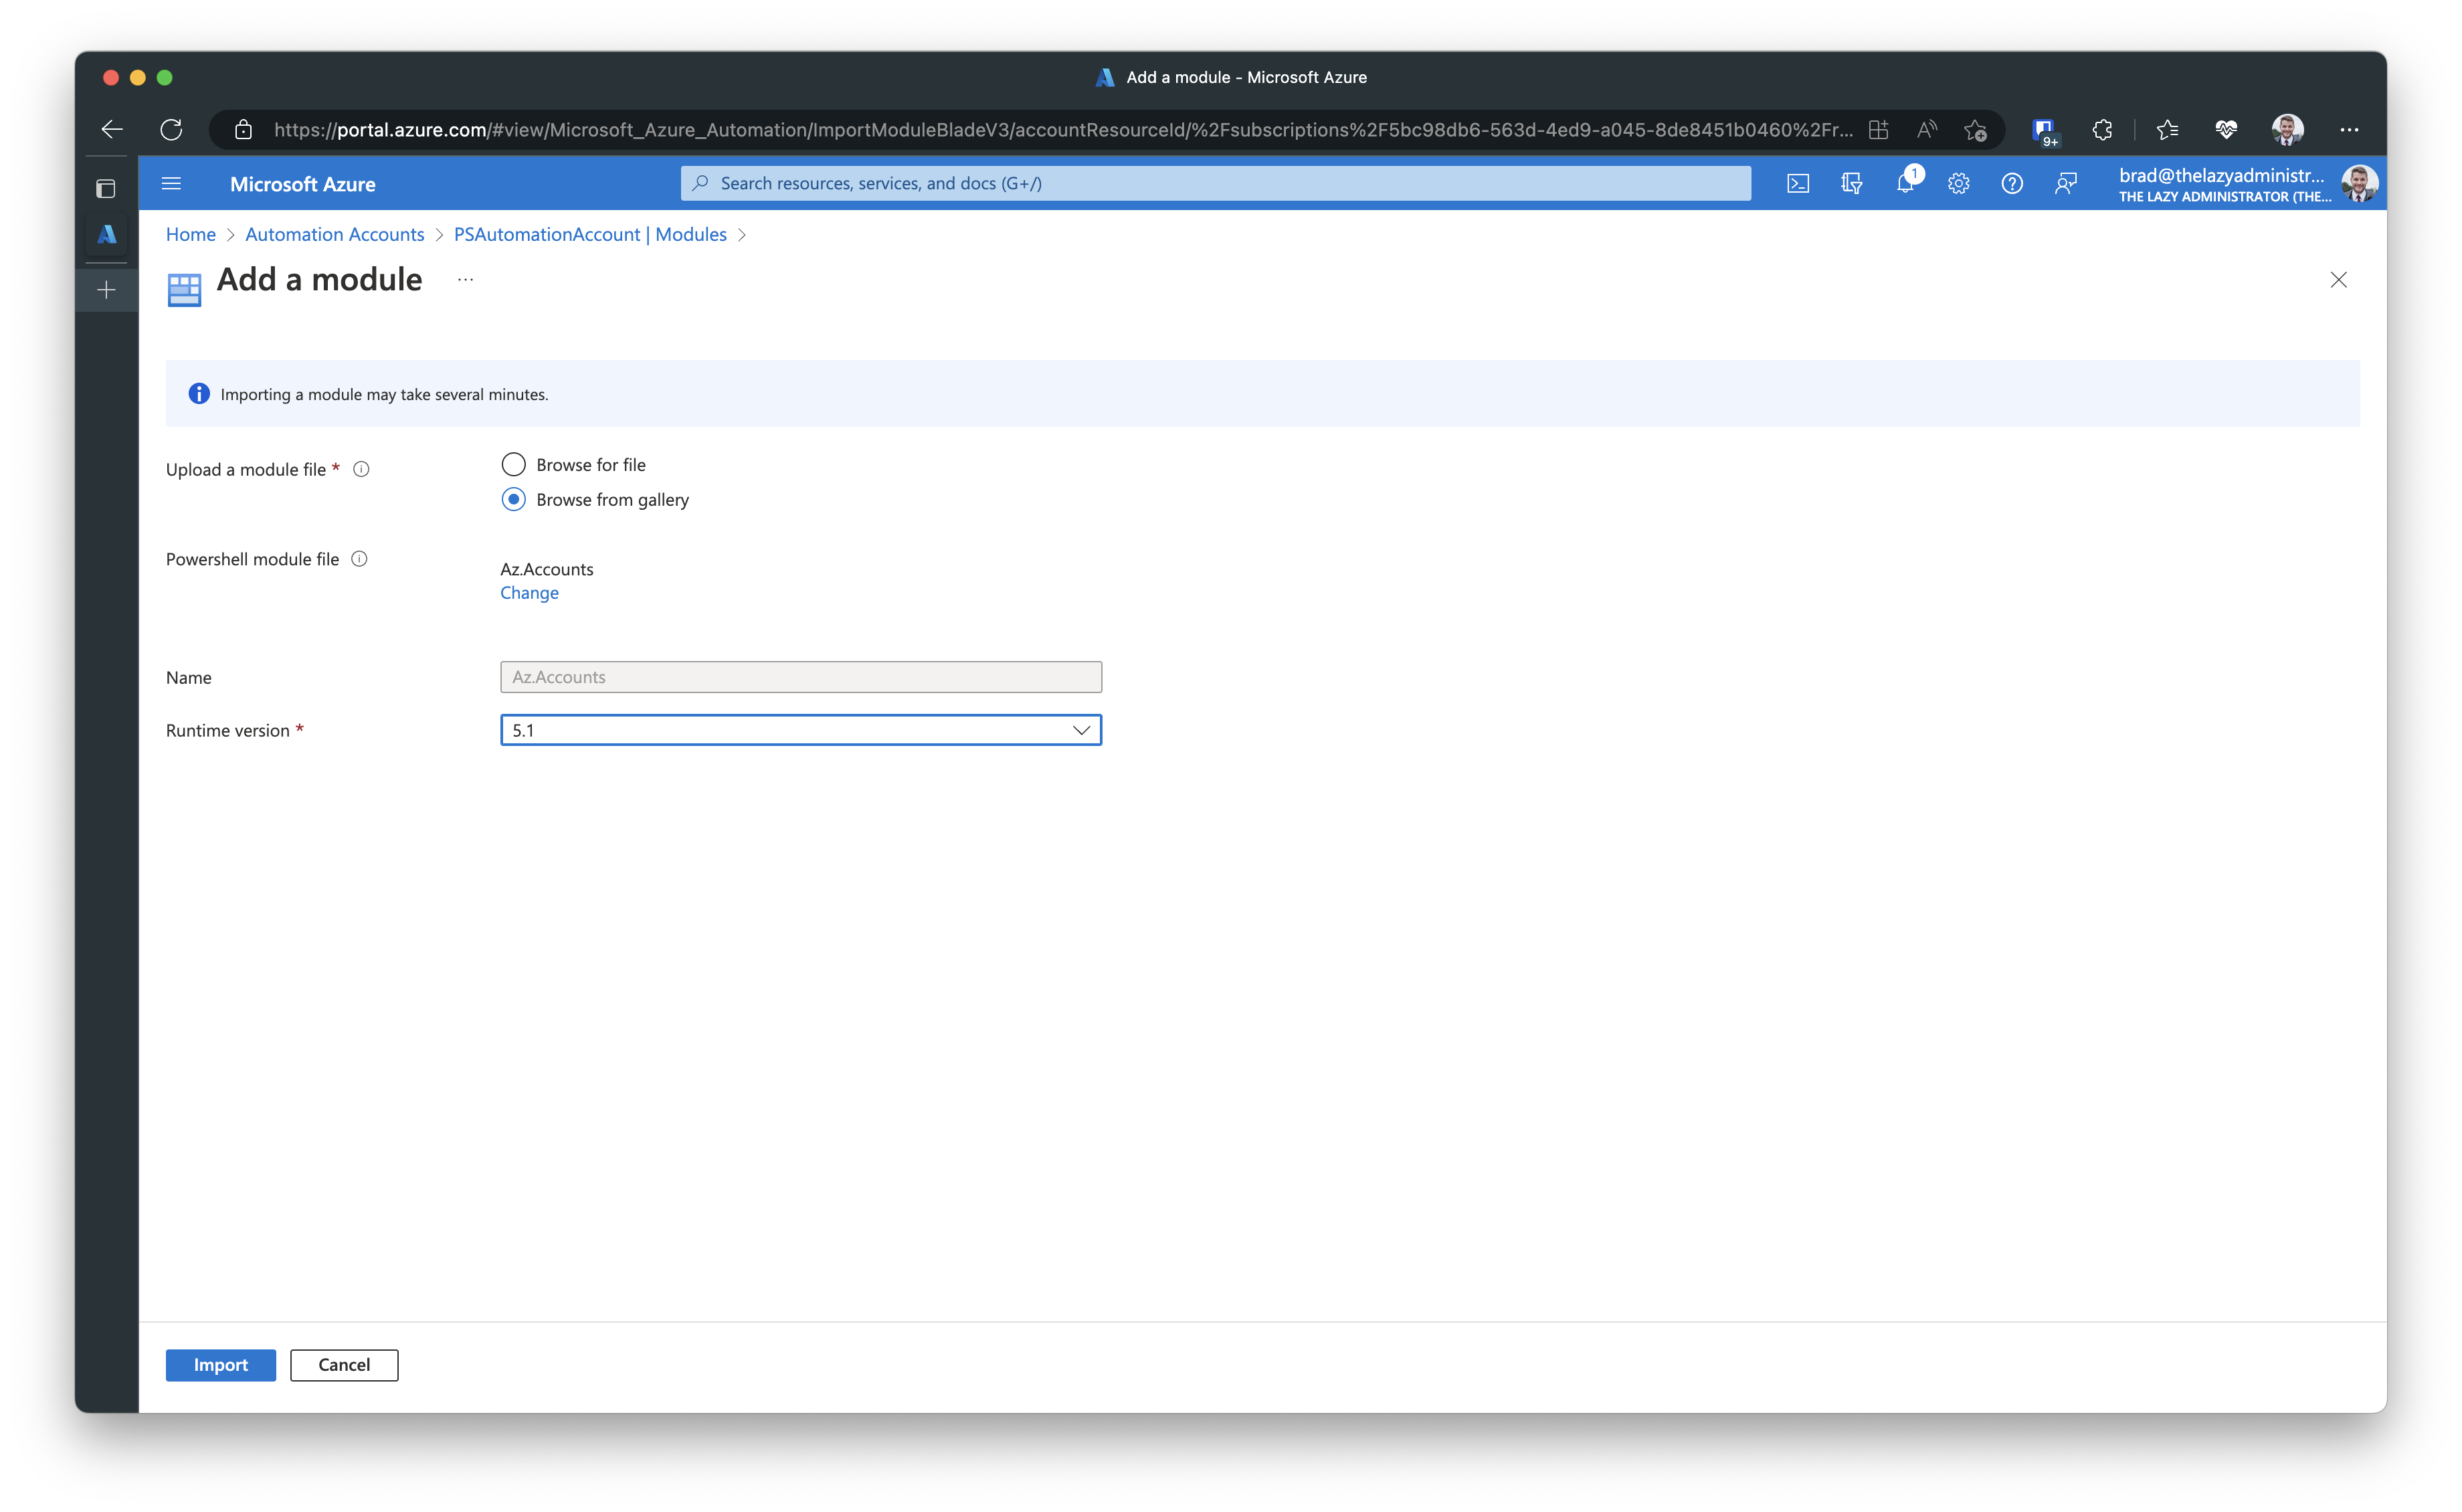
Now, I have all the correct modules installed and available for my runbook

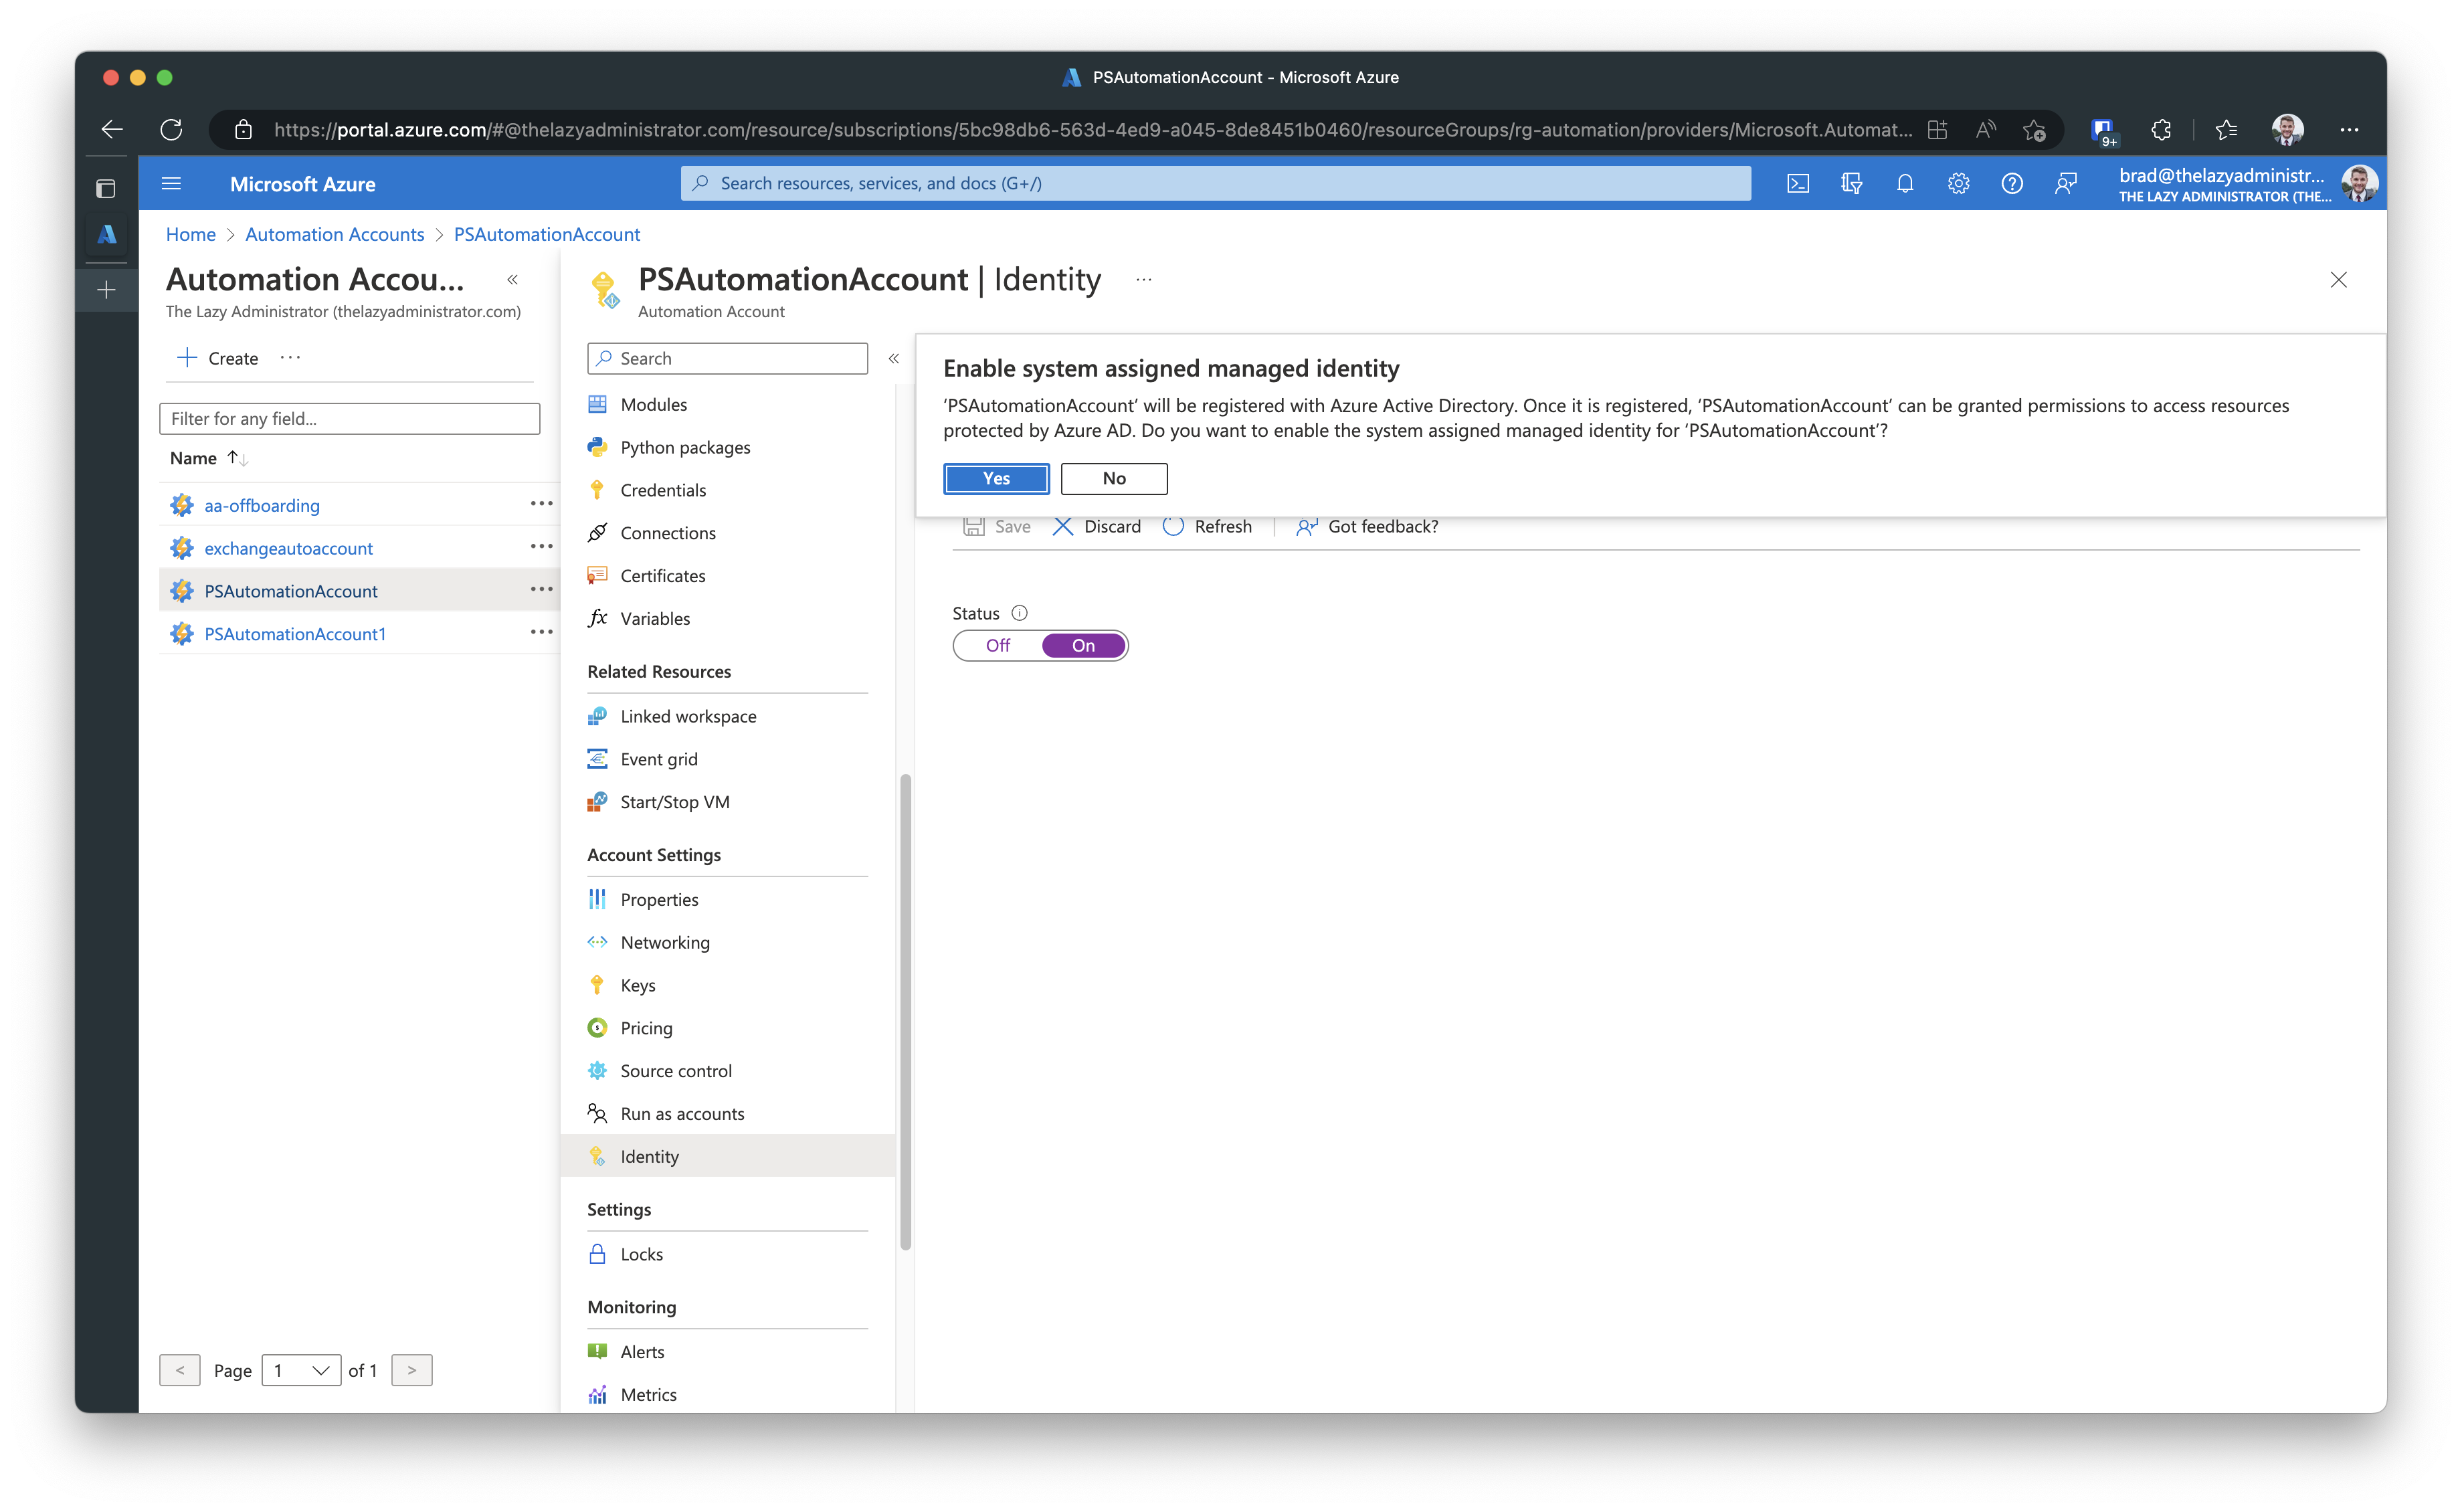
2. SYSTEM ASSIGNED MANAGED IDENTITY
System-assigned managed identities are automatically created with the Azure resource and the life cycle of the managed identity depends on the Azure resource. If the Azure resource is deleted, the managed identity is automatically deleted as well. A system-assigned managed identity is a 1:1 pairing meaning it cannot be assigned to other resources.
Identity creation, I will choose a new System-assigned managed identity. By click On and saving it, Azure will automatically create the managed identity.
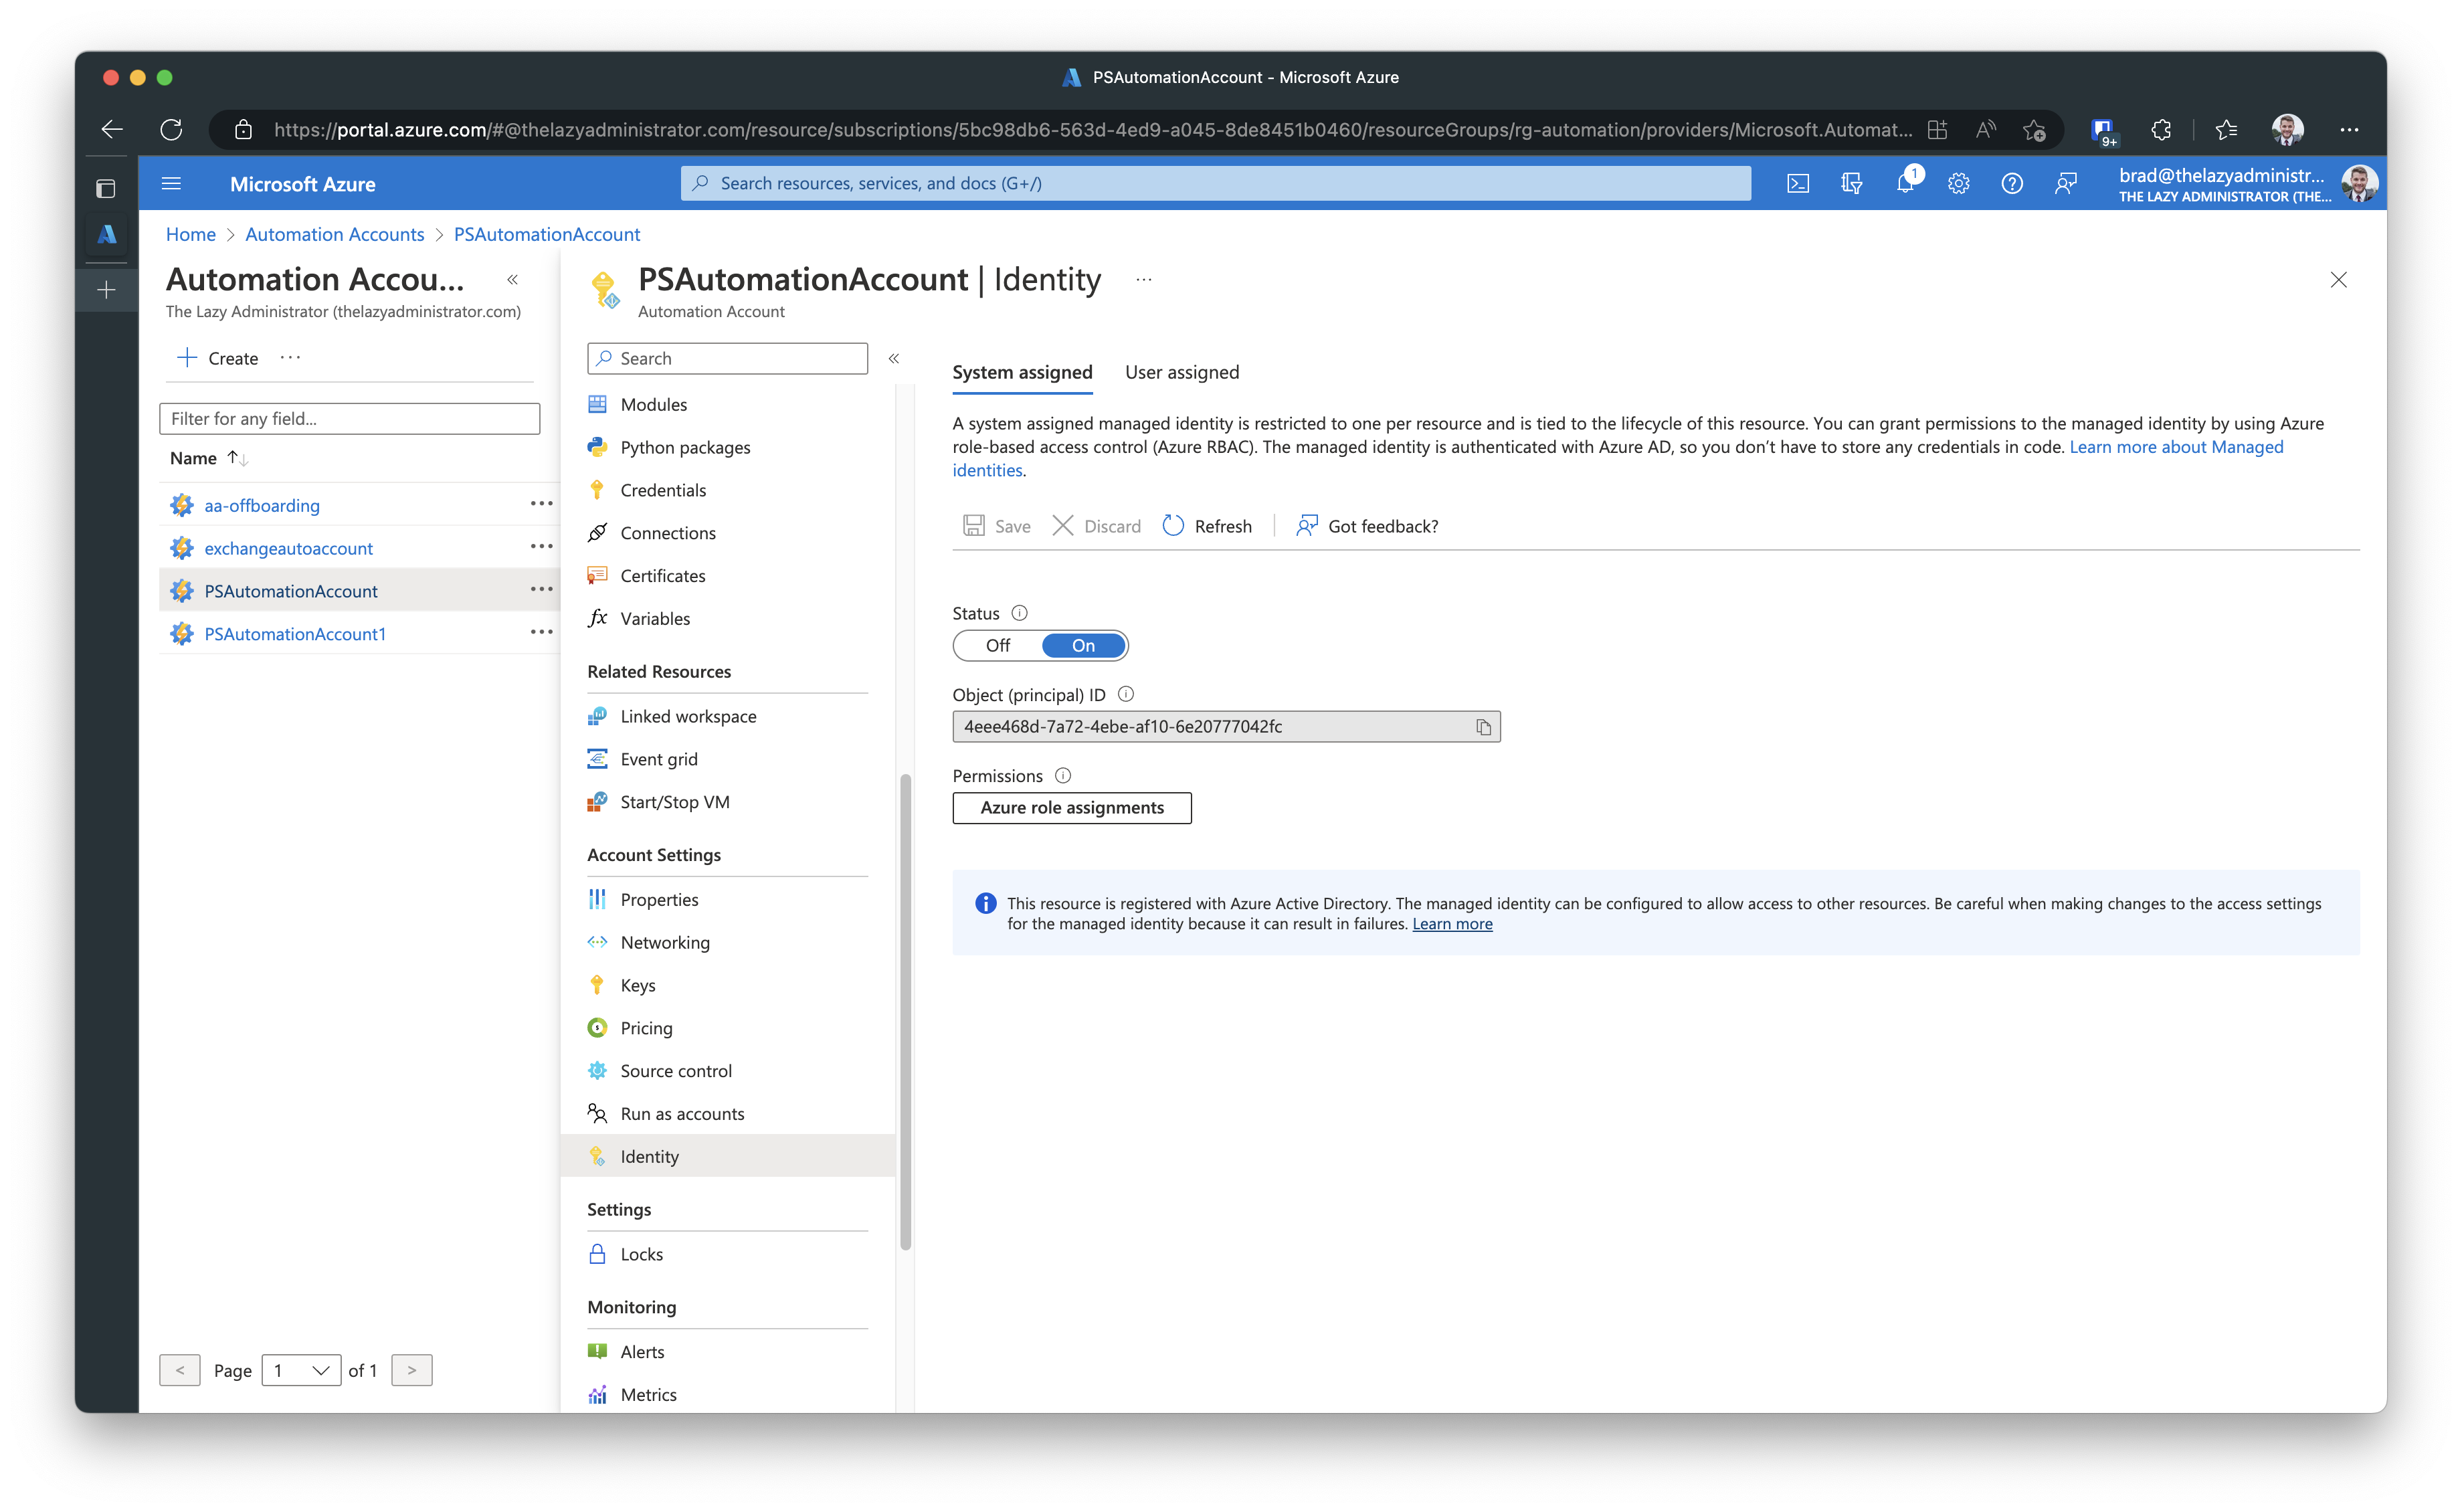
Once it finishes creating the managed identity, you will see the Object ID and you can begin assigning permissions.
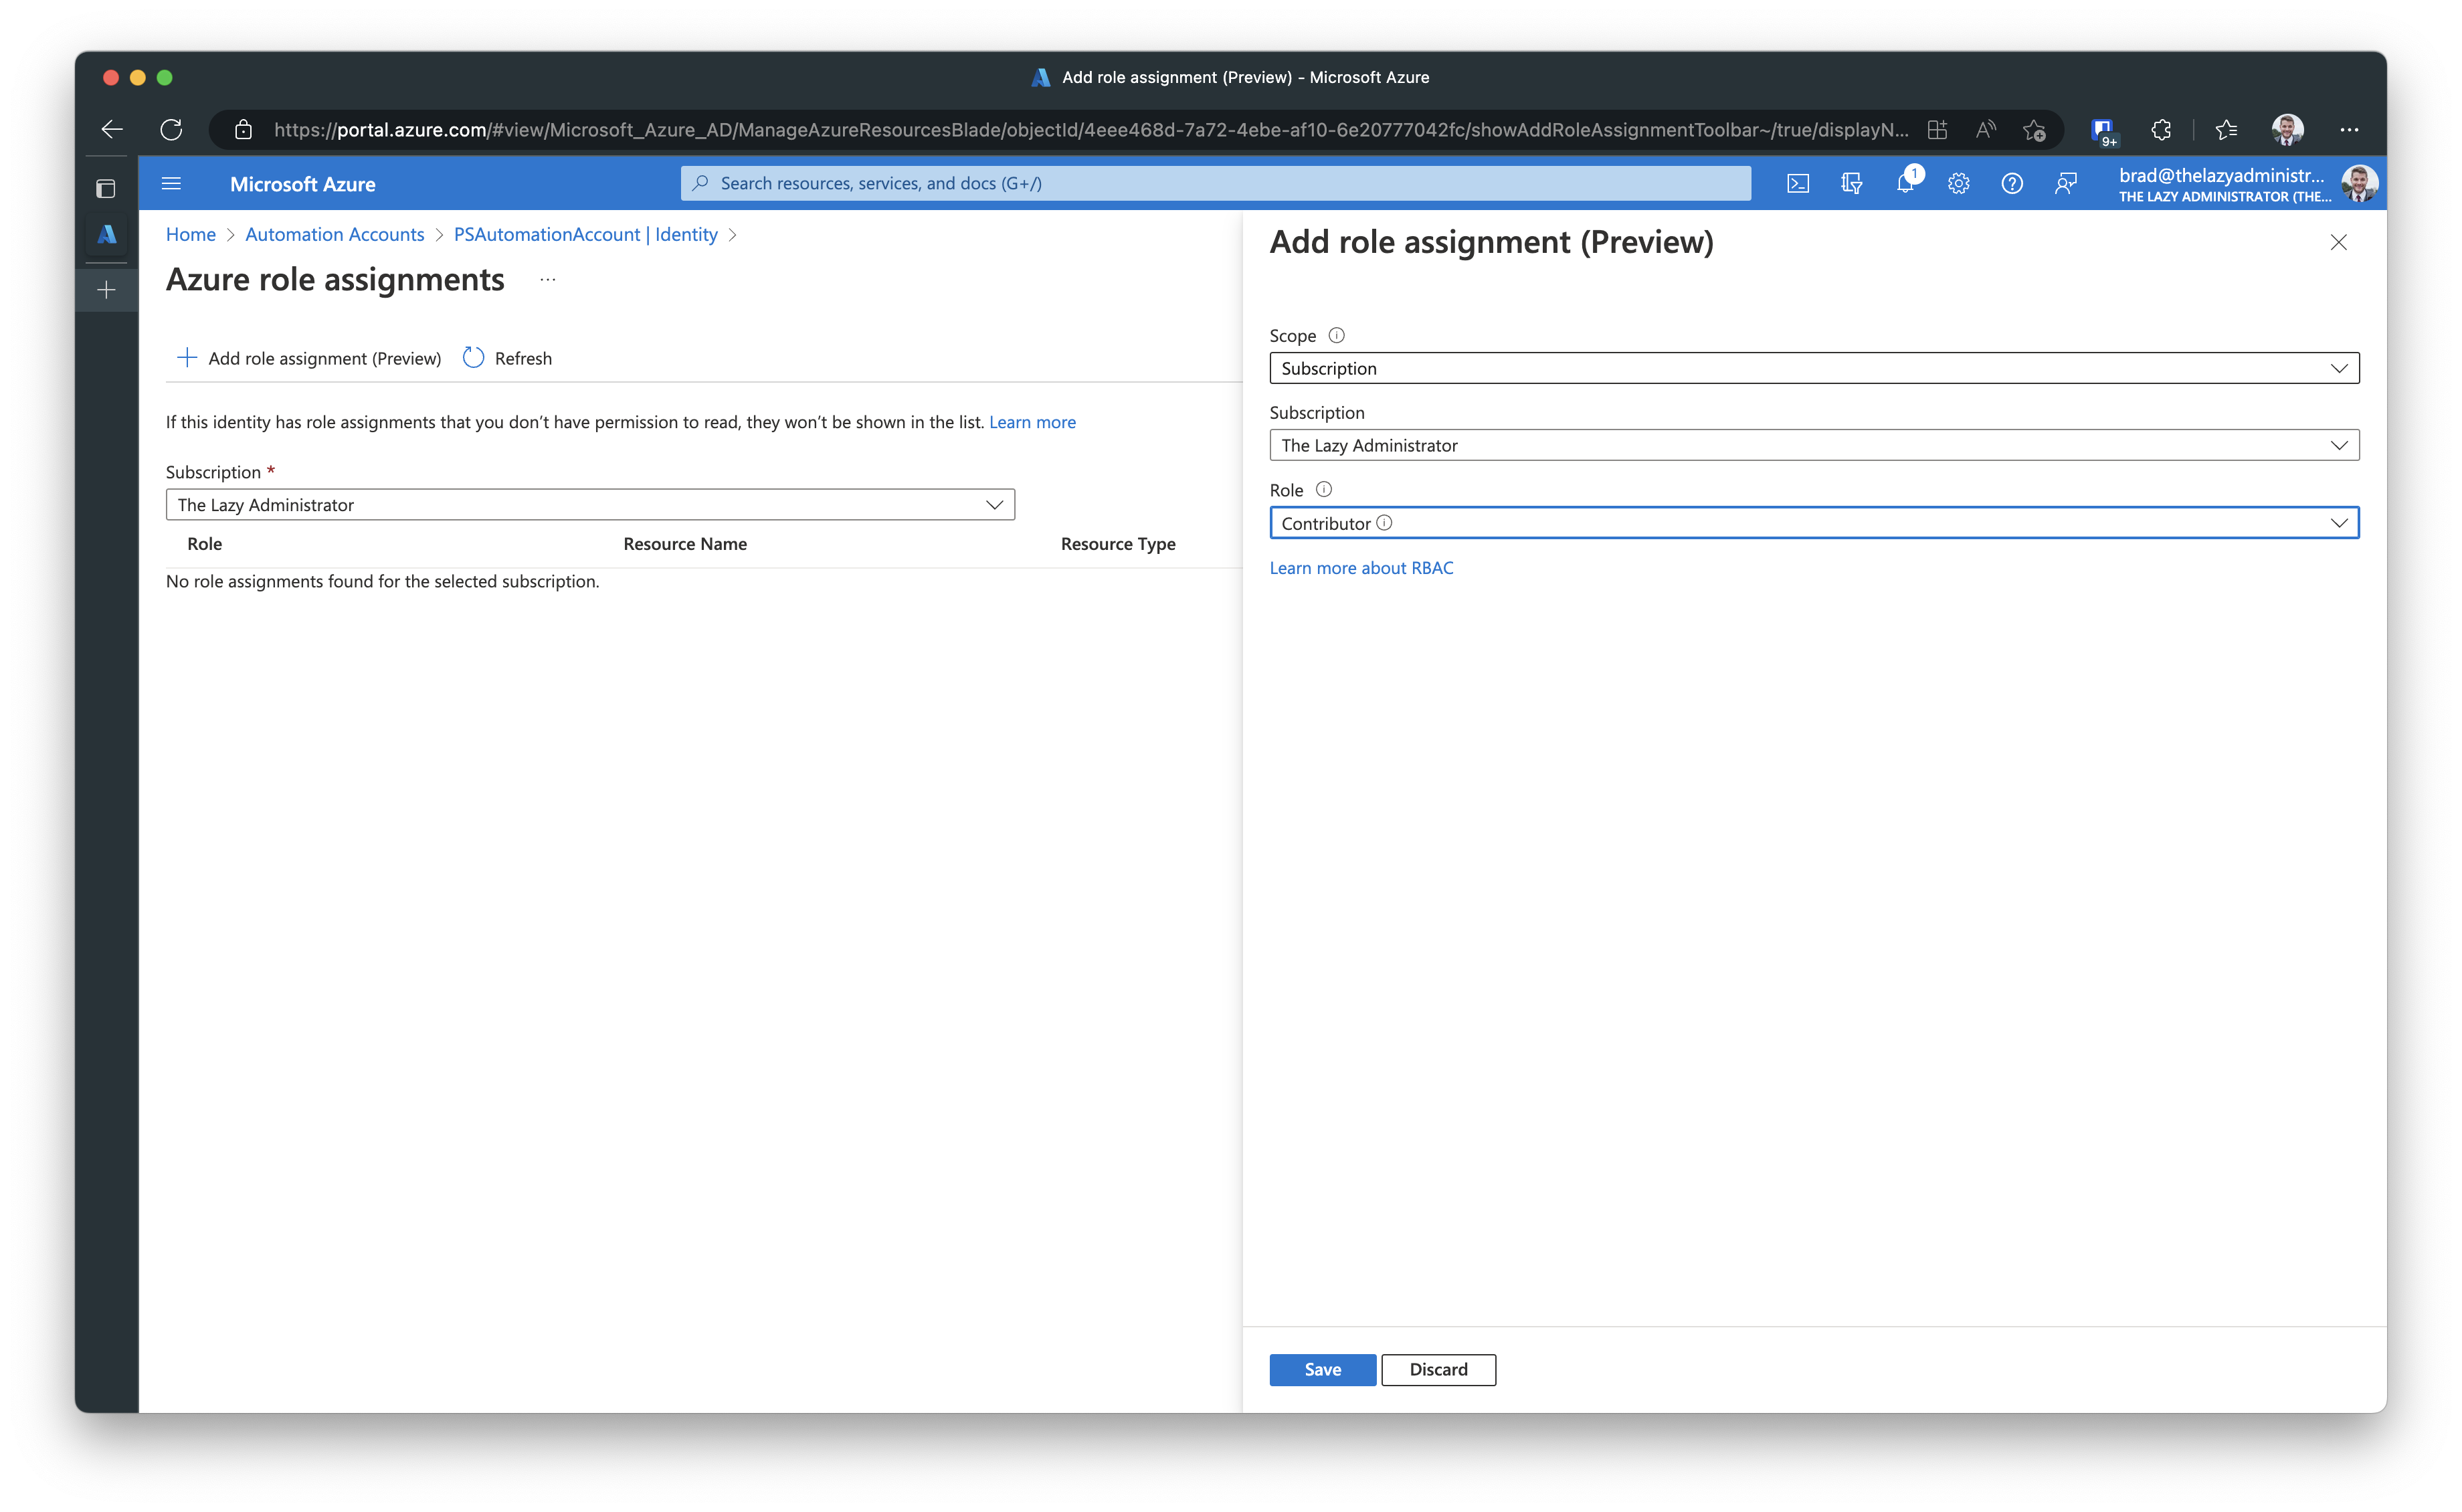
ASSIGN PERMISSIONS TO THE MANAGED IDENTITY
Click on Azure Role Assignments after you create your new managed identity. Add the same permissions your previous RunAs account had. This is a good opportunity to ensure that it does not have more permissions than it needs. In the scope section you can select Subscription, Resource Group, Key Vault, Storage or SQL.
Once you are finished, you will see the role assignments assigned to the new managed identity.
3. Create New new graphical runbook as like same like for stop / start VM
Create New new graphical runbook as like same like for stop / start VM
From Browse gallery

Add these two for start and stop VM only (do this one by one)

Next you will see this. just click to select button from bottom

Then you will see this. Name it and click to import

Finally, its created. now just click on the published

Schedule
After Published, go to schedule and same VM schedules like in the old runbook

Link your schedule

Then click to Parameters and run settings. You will see next tab below
ADD RESOURCEGROUPNAM
ADD VMNAME
ADD SUBSCRIPTION ID (its important)

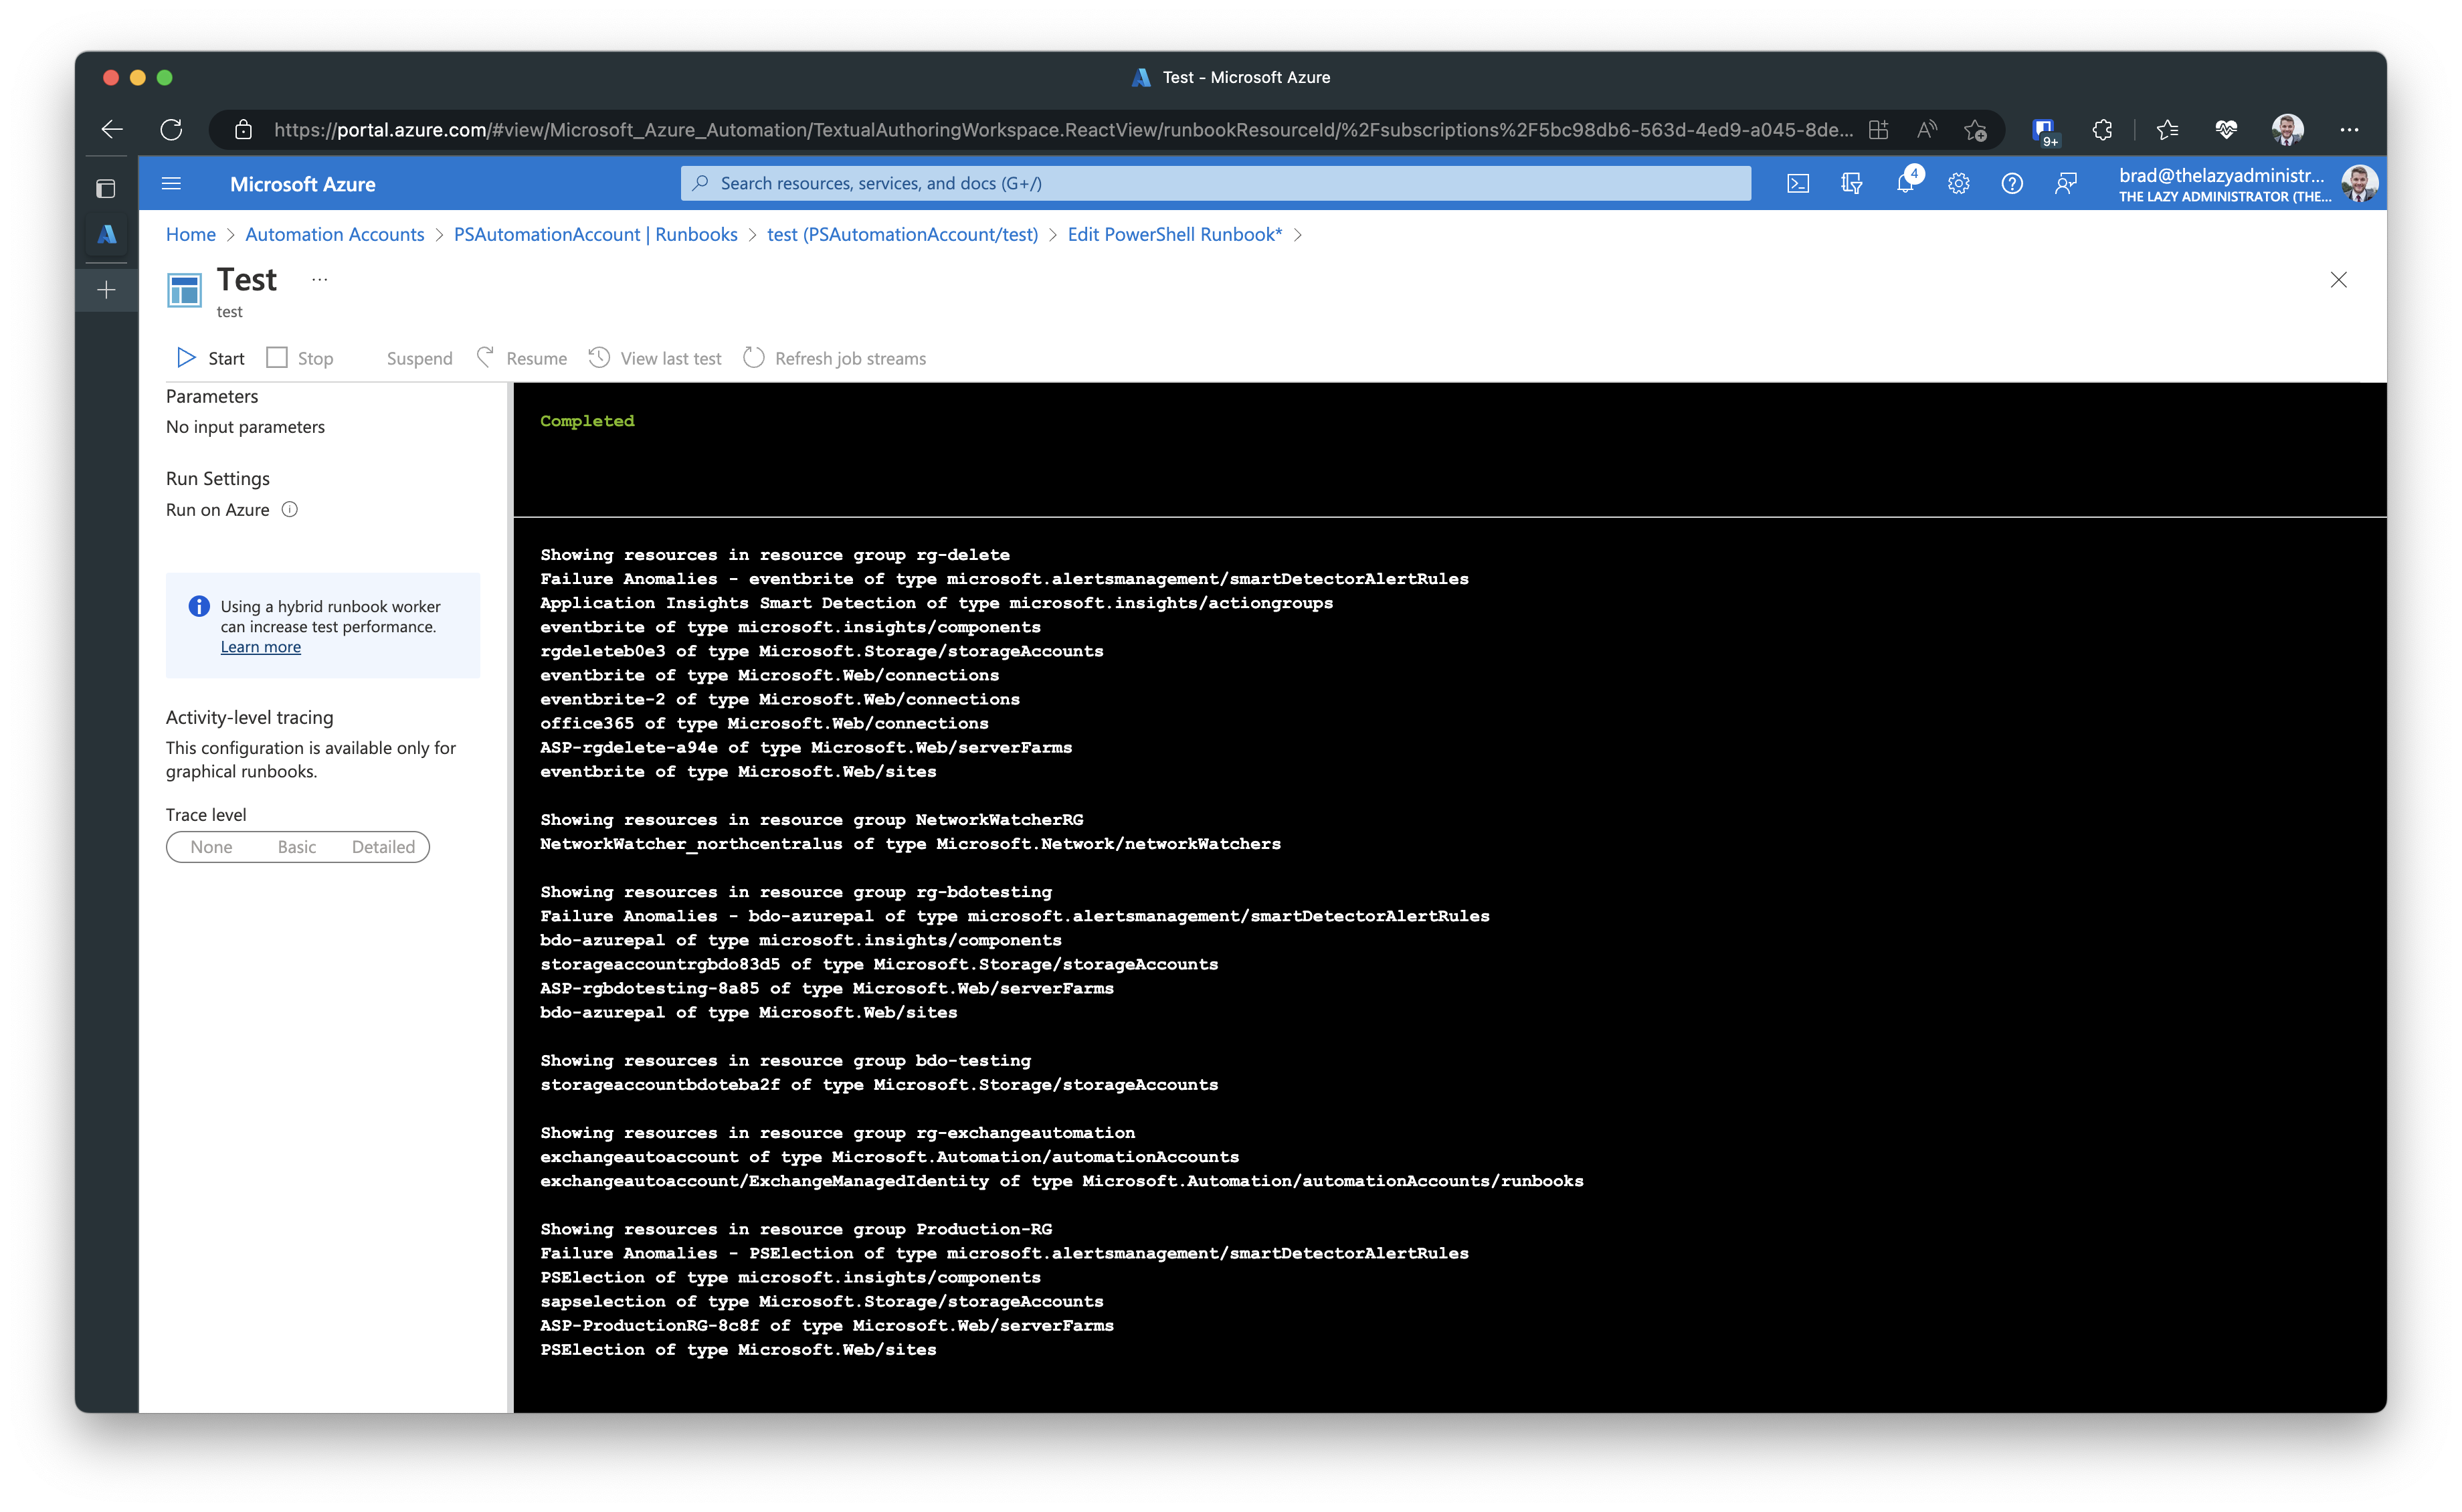
Now its completed Now you test it. It will work.
Unlink schedules from old graphical runbook.
Remove old graphical runbook for run as accounts
If I go back to my runbook and test it, I can now see that is works without issues.
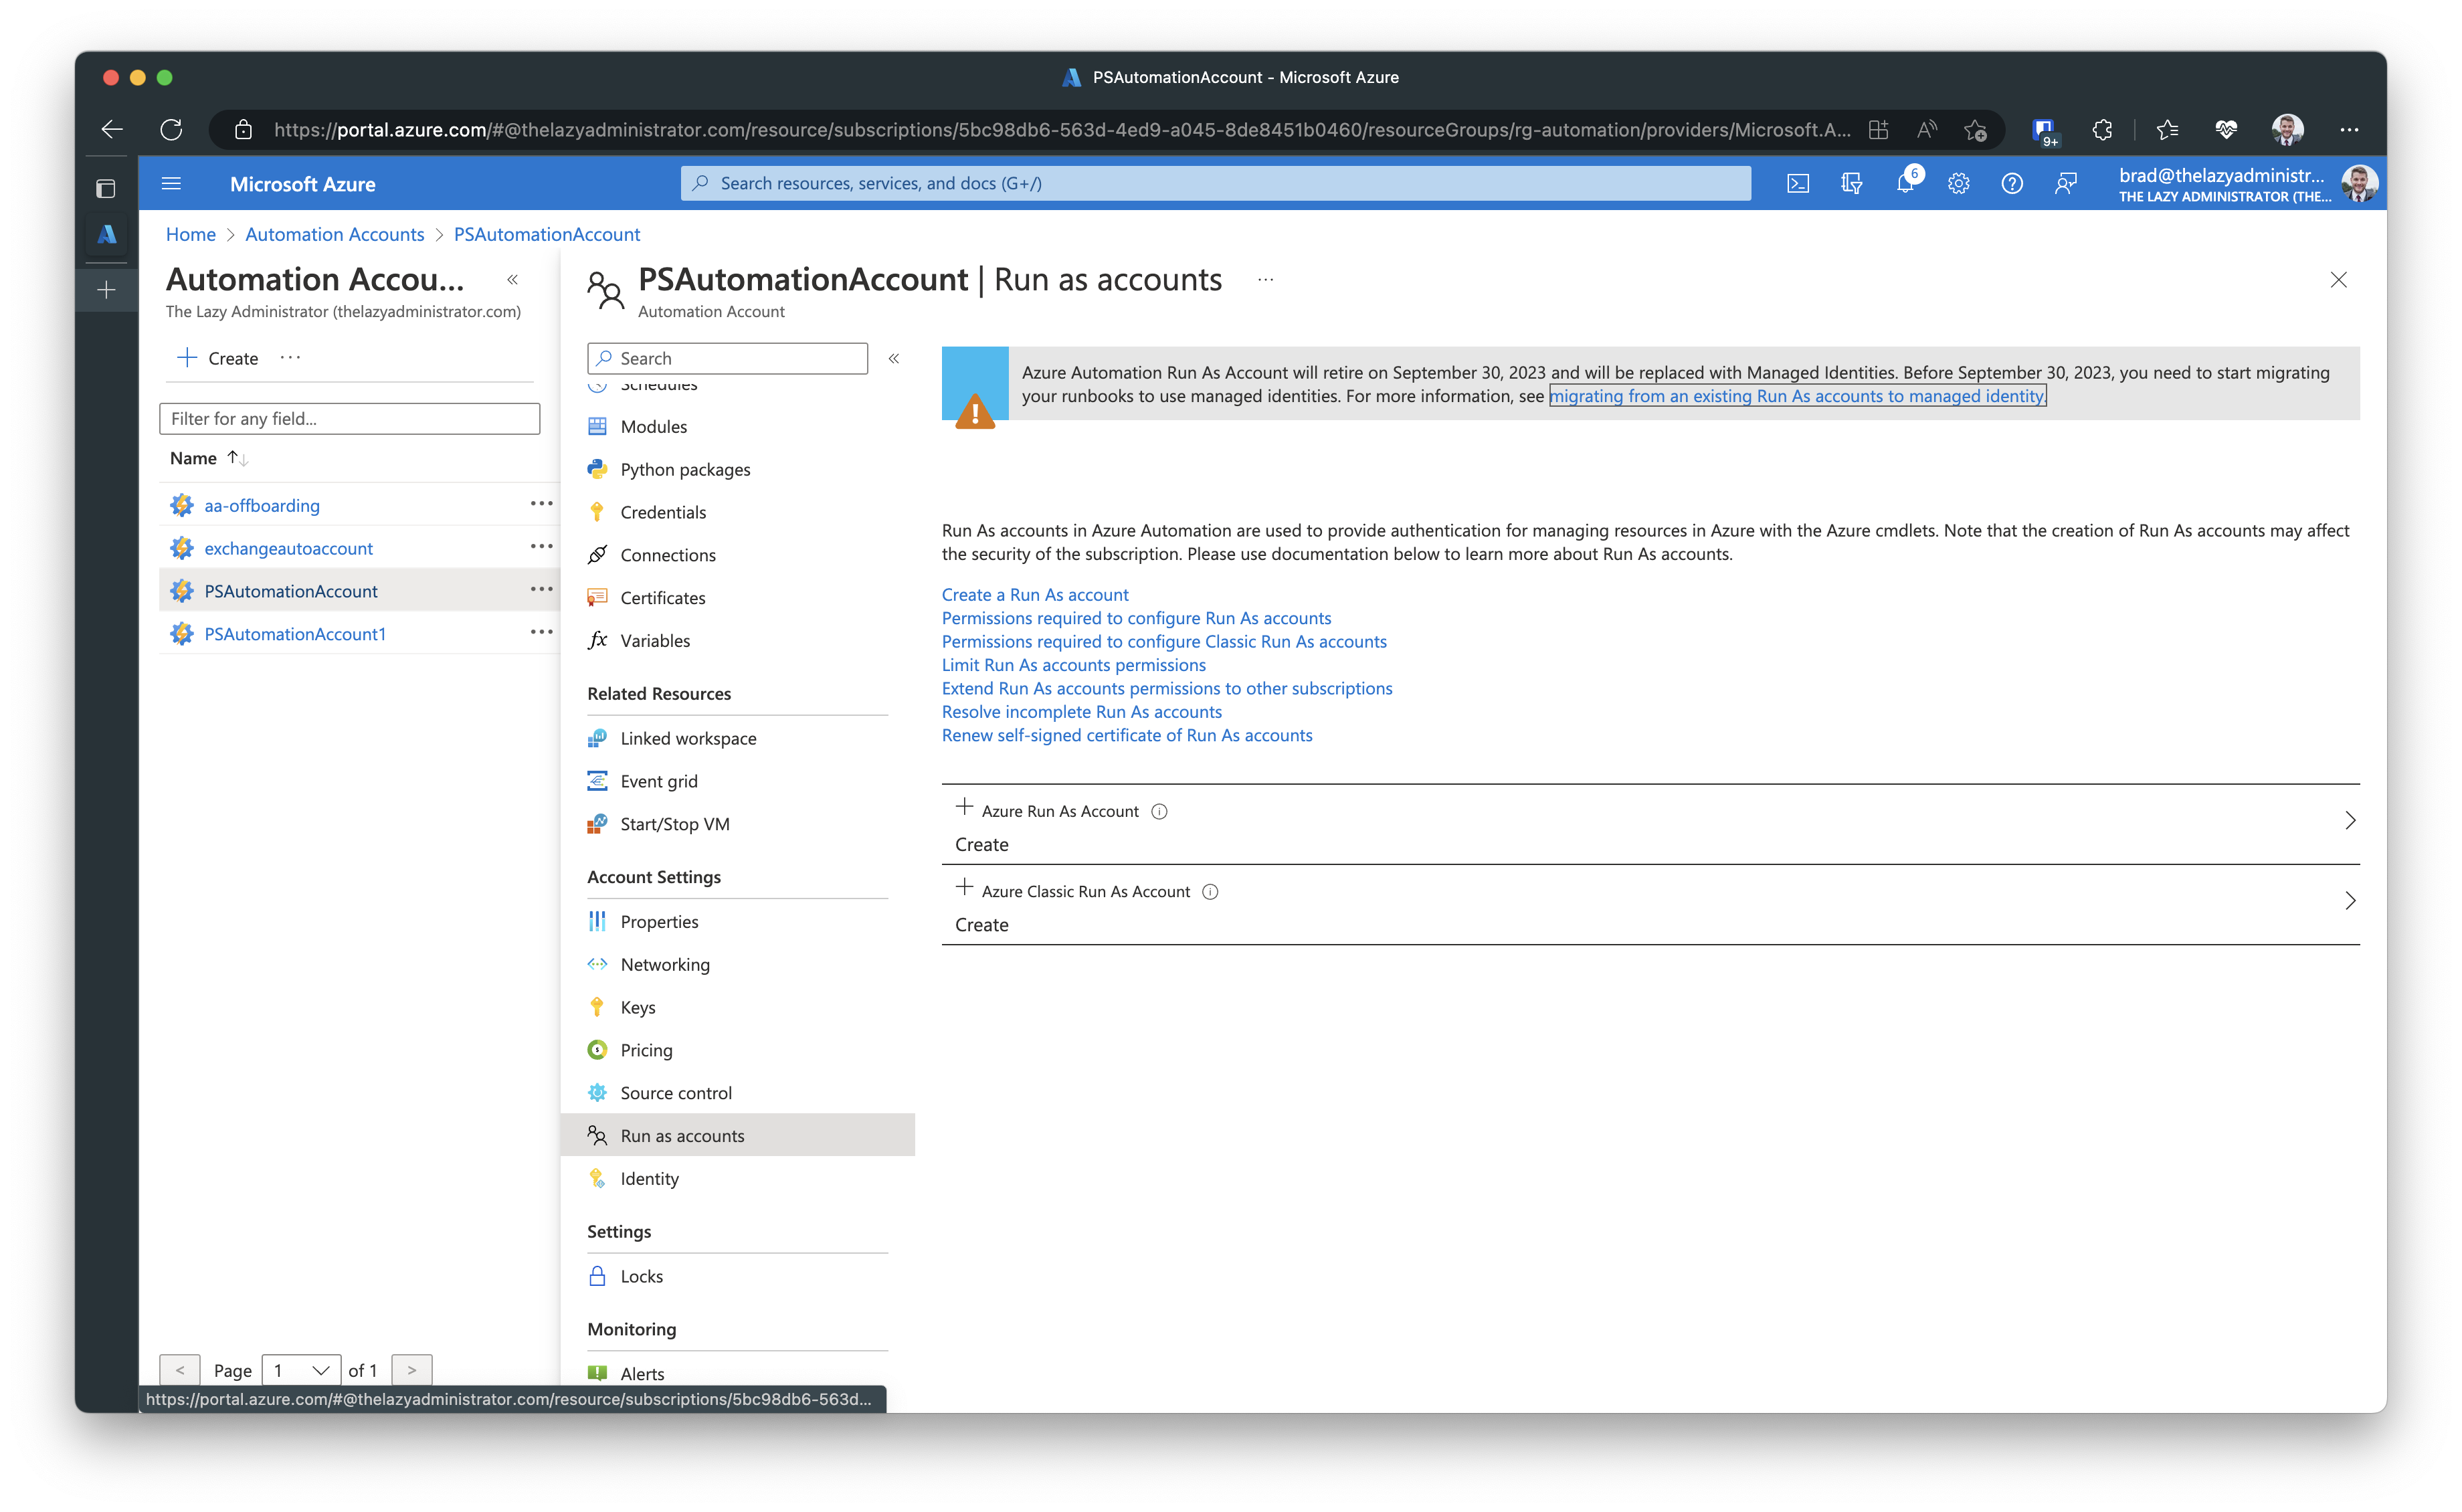
CLEAN UP RUNAS RESOURCES
The final task is to clean up the RunAs resources. Go back to the Automation Account > Run as Accounts and then click Delete
Once finished you will see that your automation account no longer has any run as accounts tied to it. It will also be deleted from Azure Active Directory.